Lecture 14: Professional Websites with Quarto
December 2, 2025
By the end of this class, students are anticipated to:
Understand the basics of Quarto
Build a simple, professional website
Video Lecture
Quarto Websites
Turns out, you’ve been using a Quarto website this whole semester! Our STAT545 webpage (the one you’re on right now) was build entirely using Quarto. And, this was build using no prior Quarto knowledge or fancy tools - this was actually my first website build ever.
Let’s “learn by doing” and build a webpage together! This is a great opportunity to build a professional website (like mine) using Quarto. We will host our website on Github to make things easy!
Install Quarto
Before continuing, ensure that you’ve installed Quarto these directions.
Initial Website Set-up
Step 1: In RStudio, create a New Project. Select “New Directory” and then find “Quarto Website”. If given an option for version control, select Git. A simple build of a two paged website will generate.
Step 2: In the Terminal, run touch .nojekyll (Mac OS) or copy NUL .nojekyll to disable Jekyll.
Step 3: Within the RStudio project, navigate to the _quarto.yml file in your files (right hand pane). Under the project: preamble, add output-dir: docs.
Step 4: Navigate back to index.qmd. Save and click the Render button. A local version of this simple website will appear.
Now, we should send this to GitHub so we can host our website on GitHub and make changes both locally and through GitHub. To do so, we need to connect this R Project with Github.
Step 5: When you made this project, you should have selected to use Git as a version control. If not, head to Tools > Version control > Project Setup and select Git as your version control. At this time, origin should be set to none.
Step 6: On GitHub, make a new EMPTY repository. This should be named with the same name as your website (i.e., yourname.github.io). Ensure you UNSELECT to make a README file.
Step 7: Now back to RStudio. We will be working in the terminal to give commands to our computer to connect with Github. You can equivalently use the “Git” tab in RStudio to stage, commit, and push changes.
SAVE ALL FILES. In the Terminal (beside the Console in RStudio)
Run
git initRun
git add .Then, commit the changes of our website to Git. Type
git commit -m "initial commit"- The
-m "<description>"part adds the <description> of your changes.
- The
Now we need to tell GitHub where we are pushing our changes to (i.e., the repository you just created!) using
git remote add origin https://github.com/<yourusername>/<yourreponame>and filling in your username and repository name.Push the changes using
git push -u origin main. Head back to github to see new files added to your repository.
Step 8: See your new website
On Github in your repository, click the three dots and head to settings.
Navigate to
pageson the lefthand side menu.Under
branch, selectmainas your branch and/docsas the folder. Select save.Give it a few minutes and refresh if you don’t see a success message pointing to the website.
Head to <yourreponame>.github.io to see if it worked!
Step 9: Edit your website and push the changes
Edit your version locally, and render and save.
Then, in the terminal:
Run
git add .Run
git commit -m "<description of your changes>"Run
git push origin main
General tips
Sometime if you change a file name or remove it, Quarto will get confused. You can go to the
docsfolder and delete the old file name/file you deleted and re-render and save.To re-render all documents, use
quarto renderin the Terminal. Then, save all. Do this before staging and committing changes to GitHub.Use folders to keep things organized.
For people less familiar with Markdown syntax, the “Visual” viewer is useful! It provides a more user-friendly IDE and buttons for things like titles, bold text, lists, links, images, formatting, and tables. It is directly below the Save button on RStudio. You can toggle between Source and Visual to see the Markdown version and a more visual version of your files.
Create a Professional Website
Let’s build on this sample Quarto website to make something more personal and professional.
Build the Template
Open the _quarto.yml file. Let’s update the contents to this (fill in <Your Name>):
project:
  type: website
  output-dir: docs

website:
  title: "<Your Name>"
  navbar:
    left:
      - href: index.qmd
        text: Home

format:
  html:
    theme:
      - cosmo
      - brand
    css: styles.css
Update the Homepage
The homepage is our index.qmd file. In our _quarto.yml document, we named this page “Home”! You can see this in this section:
      - href: index.qmd
        text: Home
Now that we’ve told Quarto where our homepage is, let’s update it.
Add a Headshot and Link your GitHub
It’s useful to add a headshot to your website! At this point if you don’t have a nice photo of yourself or are not comfortable adding one, just grab a stock image online of your favourite animal. (Side note: I’d recommend getting a professional headshot if you don’t have one! This is something on my own personal to-do list)
- Create an
imagesfolder in your directory (same place as yourindex.qmdfile), and save the image you’d like to display there. I’d recommend saving the image asavatar.png.
We will use the jolla template, which is provides a nice home page for personal websites. We’ll also add a link to your GitHub profile so people can see your projects.
In your files, you should see index.qmd. Do not rename this file! Quarto knows that this is your “home page”.
- Open and edit the
index.qmdfile, and fill in the appropriate information indicated in <>:
---
title: "<Your Name>"
about:
  template: jolla
  image: images/avatar.png
  links:
    - icon: github
      text: Github
      href: https://github.com/<yourgithubusername>
---
The stuff between the --- is called the Preamble, which builds the foundation of the webpage.
Add your Education
- Let’s add your position (Graduate Student in <Department>) in italics, and add our institution. This will be under our photo. Let’s add the following under our Preamble:
*Graduate Student in <Department>*

University of British Columbia
Let’s also make a subsection for a more detailed look at your education. Add your current and previous education under an Education header (feel free to add or remove lines):
## Education

Degree, School | Year

Degree, School | Year

Degree, School | Year
Create Another Page
Let’s add another page that we can navigate to! First, let’s add a .qmd page to our directory. Click “File” > “New File” > “Quarto Document”. Add a title to your page, and keep all other defaults. We will be adding a page containing Courses we’ve taken at UBC as an example. An appropriate name could be simply “Courses”. We can update this later if needed.
Open the new file. Update the preamble to include the date at which the page was last modified:
---
title: "Courses"
date-modified: last-modified
---
Now, let’s add some information! It’s your turn to explore Quarto.
Now, the page is ready to add to our website. Open the _quarto.yml file and add courses.qmd to the list of webpages.
website:
  title: "<Your Name>"
  navbar:
    left:
      - href: index.qmd
        text: Home
      - courses.qmd
Head back to courses.qmd, save all, and render. Do you see your new page in the navigation bar?
Save all files and click the Render button. Click through your website to ensure that everything is working!
Push your Changes to Github
Everything you’ve done so far only exists on your local machine.
In the terminal, do quarto render to re-render all documents. Save all.
Then,sStage, commit, and push your changes (Steps 7 and 8 above). Test our your new website by visiting it using the GitHub link (see Step 8).
Getting Fancy
Here are some ways you can elevate your website!
Adding a Search Bar
Add
search: trueunder yournavbarin your_quarto.ymlfileExample:
website:
  title: "STAT545 @ UBC"
  navbar:
    background: primary
    search: true
Adding a Drop-down Menu
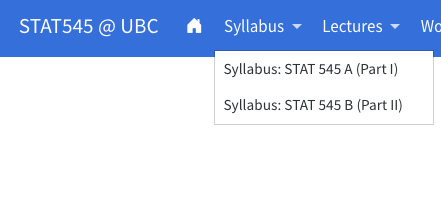
Some websites (like our STAT545 website) have so many pages that we need to condense topics into our top navigation bar. This can be achieved with a drop-down menu. I’ll show an example of how I have a drop-down menu for the two STAT545 Syllabi (A and B).
I like to organize the website so that anything in a drop-down menu is in its own folder. For example, I have a webpages folder that contains a file (or folder) for each item I want on my navigation bar. I have my two syllabi hosted in webpages/syllabus/syllabusA.qmd and webpages/syllabus/syllabusB.qmd.
To create a drop-down menu, we use sidebar: in the _quarto.yml document:
website:
  title: "STAT545 @ UBC"
  navbar:
    background: primary
    search: true
    left:
      - href: index.qmd
        text: " "
        icon: house-door-fill
- sidebar:syllabus-sidebar:syllabus tells Quarto that I am going to have subpages, and I reference them using the syllabus id. For example:
website:
  title: "STAT545 @ UBC"
  navbar:
    background: primary
    search: true
    left:
      - href: index.qmd
        text: " "
        icon: house-door-fill
      - sidebar:syllabus
sidebar:
- id: syllabus
title: "Syllabus"
style: "docked"
background: light
collapse-level: 2
contents:
- webpages/syllabus/syllabusA.qmd
- webpages/syllabus/syllabusB.qmdThis creates a section on my Navigation Bar called “Syllabus”, which drops down to contain syllabusA.qmd and syllabusB.qmd, which are regular pages like the courses.qmd that we created!
Add a Table of Contents on Each Page
If you have a lot of information on each page, adding a Table of Contents can be useful. In the _quarto.yml, add toc: true
format:
  html:
    theme:
      - cosmo
      - brand
    css: styles.css
    toc: true
Add a Favicon (Website Icon) and Logo
Favicons are useful ways to brand your website. These are small icons that identify your website (think Facebook with their infamous blue “F”, or Google’s rainbow “F”) that appear in browser tabs such as Google Chrome and on web searches.
In the _quarto.yml file, we can include the following under website:
website:
      favicon: <favicon.png>
where <favicon.png> is the image (or path to the image, if its in a folder) that you’d like to use!
You can also add a logo that appears in the top lefthand corner of your website using the logo command, for example:
 navbar:
    background: primary
    search: true
    logo: <yourlogo>.png
Add a README to Your GitHub Repository
- Create a Markdown file called README.rmd, and save it in your repository folder.
- Include some information on the website, including the link so people who find your repository can easily access the website build.
- Save all changes, and push them to GitHub.
Extras
There is SO much more that Quarto can do, and this is just scratching the surface. From aesthetics to website navigation, https://quarto.org/docs/websites/ has so many examples of cool things you can do with your website.
If you’d like to see how THIS exact website was built, check out https://github.com/UBC-STAT/STAT545.github.io.
Quarto Slides
You can also build slide decks in Quarto! We won’t be getting into it in this class, but you can find the official tutorial here.
An example of a Quarto slide deck is Lucy’s guest lecture in STAT 540. This uses our preferred format, reveal.js. You can download the slide deck WITH the source here. This is a great way to make your slide deck reproducible.
Resources
- Official tutorial for Quarto website building here.